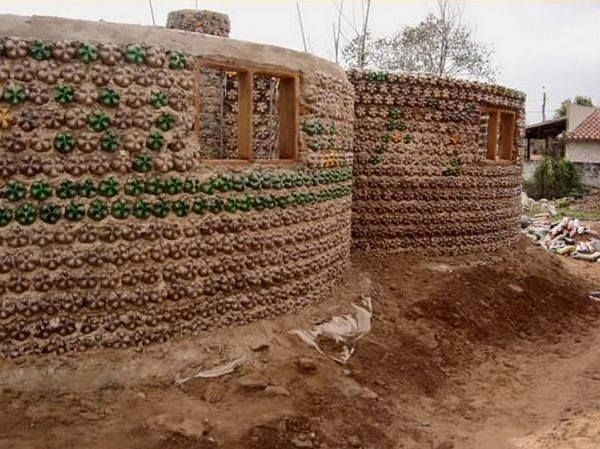
That's right, we're going to show you how you can make your own custom bullet proof, fireproof & earthquake resistant buildings with 100% recycled materials! The walls are made from used plastic bottles, filled with sand and coated with a moderate amount of mud and cement to smooth the wall and make it appealing.
How do we know if it really works?

Well this design comes from Nigerian refugees, which if anyone is to know anything about how to stay safe in a hostile environment, it's going to be these guys. And you're guaranteed to have just as much, if not more, resources than they. So what are you waiting for?
What You'll Learn About Building a Fortress
- If It's Practical For Where You Live
- What You'll Need To Get Started
- Laying The Foundation
- Making The "Bricks"
- How To Stack Them So The Walls Are Impenetrable
- How To Smooth Them For Pleasing Exterior (Until The Bullets Hit)
Is it Practical Where I Live?
We haven't seen any evidence to support that this structure would be less effective in certain climates. Granted the design was developed in a dry and arid climate, the same principals should work all over the globe. Whether you're in the desert of Africa or the ice caps of the Arctic, this structure will provide impregnable protection year round.
If you have access to a few thousand used water bottles, sand/soil and concrete then you have everything you need to make your fortress.
What Are the Benefits?
Durability
Obviously the fact that you're making the walls of your structure from bottles filled with sand that are lying horizontally means that your walls will be roughly one foot thick! And due to the lack of biodegradability of the bottles, they are proven to last 300 years.
So unless someone lays siege to your house with a 50 caliber weapon, there's not much to fear.
Also these houses have been built to withstand 30 tons of wet material with just support from the plastic bottle walls.
Photos from ecotec-africa.com
The Cost
Building one of these houses is roughly 1/4 the cost of a normal home. Which means that this option is cheaper, tougher and more reliable than purchasing a storage container. And since it's 100% recycled material, odds are that you can simply collect all your materials for the wall for free!
Absorbs Shock
The construction of the interior of the wall is such that some motion is allowed. Meaning that should your area be hit by an earthquake or shockwave, the bottles are able to move and your wall will remain standing when others will fall.
How Do I Start?
All you need to get started is a few thousand plastic bottles, a whole lot of dirt, some concrete and quite a few man hours. This isn't an overnight build, rather a lengthy endeavor.
The bottles you choose to use will need to be uniform in order to maintain the stability of the wall. If you have miss shaped bottles stacked on top of each other without anything in them it would be difficult, it would be more difficult with bottles loaded with dirt. So don't make it harder.
Also the dirt that goes into the bottles will need to be sifted in order to make it fine enough to be packed tightly. You can use sand if it's available, and that will be much easier to load into the bottles.
If you use dirt that's clumped up with air pockets that will impair the stability of the structure, so just use fine dried dirt that packs easily.
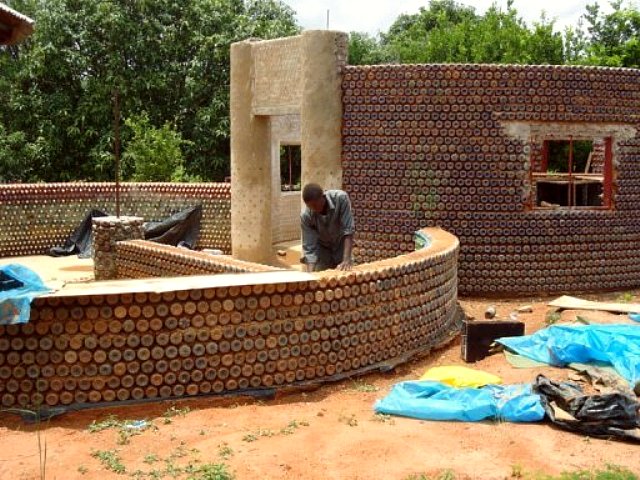
Laying the Foundation
Just like preparing to build a house, you'll want to level the area and pack the dirt to make it level in all areas so that the structure will be solid.
Next you'll want to lay the first layer of bottles on the ground to get an idea of just what you'll be working with. In this stage you'll want to ask anyone you know with engineering skills to help make sure that you're not building a house of cards that could come down on you. Especially if you're wanting to have curved walls in your house.
Once you have the foundation laid you'll want to either use twine as a way to mark the walls or if it's nothing but straight walls then it would be wise to use boards to produce a perfectly straight line.
Making the "Bricks"
This will be the most tedious part of making your bulletproof and fireproof fortress, but it is the most crucial element. Packing the fine dirt into the bottles will be the stopping force for bullets to keep you and your family safe.
To pack the dirt in as tightly as you can you'll want to use a stiff pole (preferably metal) to push it all down and make it as solid as a brick. Again use FINE DIRT to prevent air pockets and squishy bricks.
Stacking The Bottles
You'll stack these bottles the same way you would stack bricks when building a house. Place mortar (clay mud or light concrete) as a base, lay down the first row with even spacing between bottles, lay the mortar on top of this layer and repeat this process until the wall reaches a desired height for your new fortress.
This is when things need to be exact, so as to prevent the wall from falling either way. And in order to get the bottles to line up straight you'll want to use a plumb line as seen in the above video. This will allow you to keep the bottles from staggering back and forth in the stacking process.
As for the spacing between the bottles you'll again want to use something consistent like a piece of wood. The mortar that you'll use to bind the layers together can be clay-like mud or a mild cement to bind it together.
When going down the row of bottles you'll want to overlap and wrap string around the bottles, this will keep them in place while the binder solidifies and will increase the integrity of the wall.
Filling the Holes and Smoothing the Wall
You'll want to use the same mortar used to bind the layers to fill the holes where the caps stick out of the wall. Unless you would like to use the caps as decoration for the interior or exterior of the house like the ones below.
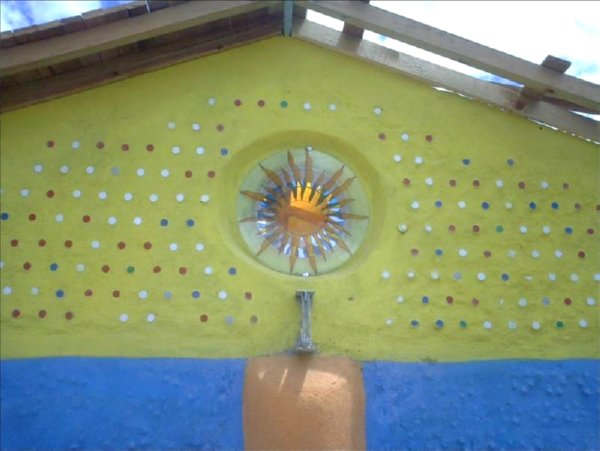
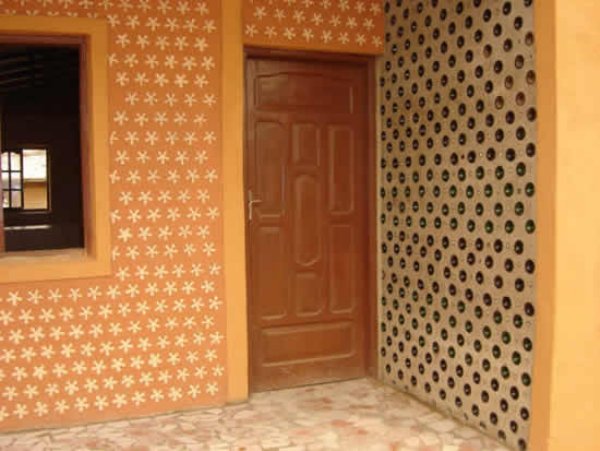
At this point you can either smooth over and cover the caps poking out, or you can let them show.
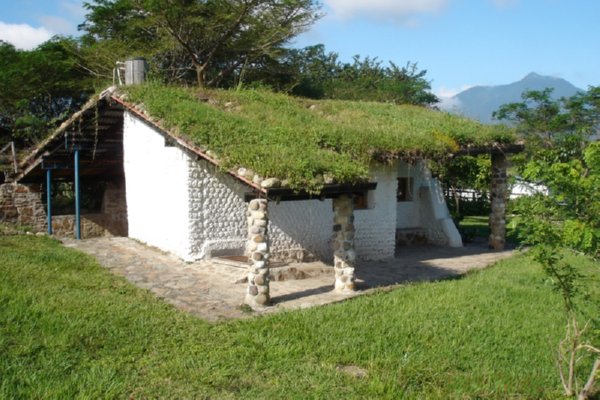
Now it's time for the icing on the cake, and this is a very accurate metaphor. Because you'll be putting concrete over the structure to give it a smooth appearance and that finishing touch of support to keep it sturdy.
The concrete you'll use to smooth the wall will need to be much more dense than what you used for the mortar. This layer of concrete will be the first line of defense for any fires or bullets that assault your new fireproof and bulletproof house of plastic bottles 😉
Now You're Done!
Well you're at least done with one wall lol!
Just repeat this process as many times as necessary to make the plastic fortress of your dreams! And remember that the only true cost of this structure will be your time, and the more people you can get to help, the faster it will go. So offer refuge if needed for those who are willing to help, or you can work on this yourself with your family if you have a good number of able bodies.
So you've learned how to make a fortress fit for a king with nothing but plastic bottles. Share this information with your companions and make sure that those you love will have a safe place to take refuge should the SHTF. Stay safe friends.

Share to Pinterest


of course like your web-site but you have to check the spelling on several of your
posts. A number of them are rife with spelling
problems and I to find it very bothersome to inform the
reality nevertheless I’ll surely come back again.